Installing a Cloudflare Origin Certificate on your Apache server is a crucial step in securing the communication between Cloudflare and your origin server. This guide will walk you through the process of installing and configuring an SSL certificate from Cloudflare on your Apache server, ensuring that your site remains secure and trusted.
Just replace your_website_here with your domain name and you are good to go!
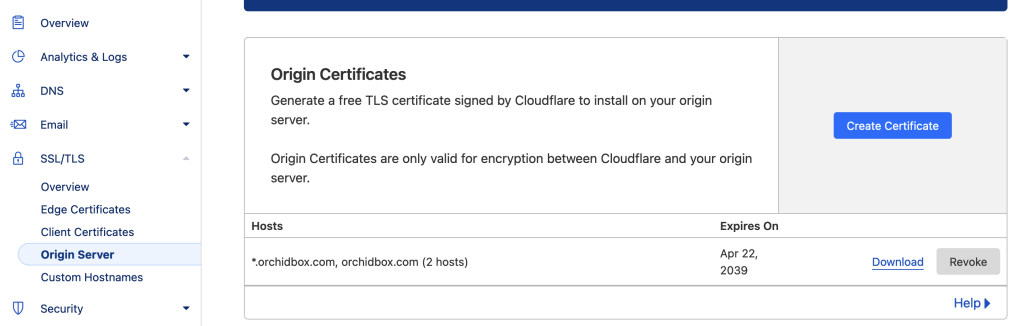
The first step involves storing the SSL certificate and private key provided by Cloudflare on your server. You’ll need to:
Connect to Your Server Using SSH:
Open your terminal and SSH into your server to begin the setup process.
Navigate to the SSL Directory:
It’s standard to store SSL files in /etc/ssl/, but you can use or create a directory that suits your configuration:
cd /etc/ssl/Create and Edit the Certificate File:
Using a text editor like nano, open a new file to paste your certificate:
sudo nano your_website_here.com.pemCopy and paste the entire certificate block, including —–BEGIN CERTIFICATE—– and —–END CERTIFICATE—–, into this file and save it.
Create and Edit the Private Key File:
Similarly, create a file for the private key:
sudo nano your_website_here.com.keyPaste the entire private key block, including —–BEGIN PRIVATE KEY—– and —–END PRIVATE KEY—–, and save the file.
Now, update your Apache configuration to use the SSL certificate and private key for HTTPS connections.
Navigate to Apache’s Virtual Hosts Directory:
cd /etc/apache2/sites-available/Edit or Create a New Virtual Host File for SSL:
If modifying an existing configuration, open the relevant file:
sudo nano your_website_here.com-ssl.confEnsure your configuration includes the necessary directives to enable SSL:
<IfModule mod_ssl.c>
<VirtualHost *:443>
    ServerAdmin info@your_website_here.com
    ServerName your_website_here.com
    ServerAlias www.your_website_here.com
    DocumentRoot /var/www/html

    SSLEngine on
    SSLCertificateFile /etc/ssl/your_website_here.com.pem
    SSLCertificateKeyFile /etc/ssl/your_website_here.com.key

    <Directory /var/www/html>
        Options Indexes FollowSymLinks MultiViews
        AllowOverride All
        Require all granted
    </Directory>

    ErrorLog ${APACHE_LOG_DIR}/your_website_here.com_ssl_error.log
    CustomLog ${APACHE_LOG_DIR}/your_website_here.com_ssl_access.log combined
</VirtualHost>
</IfModule>
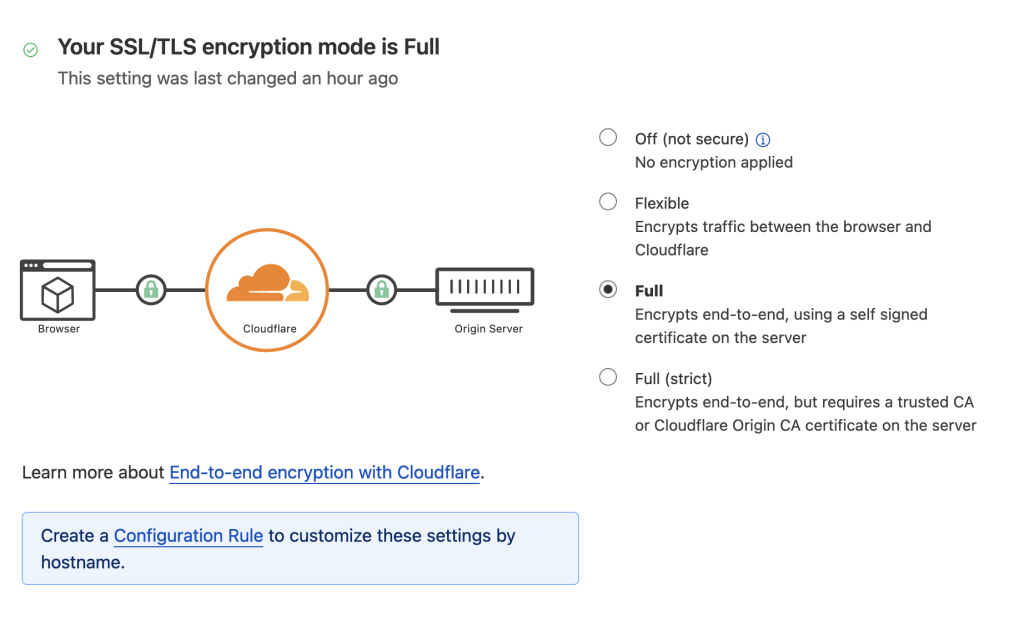
Activate the SSL module and your site configuration:
sudo a2enmod sslsudo a2ensite your_website_here.com-ssl.confsudo systemctl reload apache2Make sure Cloudflare is set to Full SSL mode. This setup ensures that Cloudflare can securely connect to your newly configured origin server.
Finally, ensure everything is working correctly:
Check for Configuration Errors:
sudo apache2ctl configtestRestart Apache to Apply Changes:
sudo systemctl restart apache2Verify SSL Setup:
Visit your website via https:// to check the SSL certificate. Utilize tools like SSL Labs’ SSL Test to confirm the correctness of your SSL setup.
By following these steps, your Apache server will be configured to use a Cloudflare Origin Certificate, enhancing the security of your site by encrypting traffic between Cloudflare and your server. This setup not only secures your data but also boosts trust among your site visitors.

